Frigate with the Tapo C200 and Home Assistant: local person detection, step by step
How to connect a TP-Link Tapo C200 to Frigate over RTSP, detect people without the cloud and get alerts in Home Assistant, with a surveillance drive for recordings.
A security camera that alerts you for every leaf that moves ends up muted. One that alerts you only when it sees a person is useful. That is what Frigate does: a local surveillance system that analyses video with object detection and tells Home Assistant what it saw, with no cloud and no subscription.
This guide describes the setup with a very cheap camera, the TP-Link Tapo C200, and the drive to store recordings on. One honest warning before you start: Frigate changes its configuration between versions. The examples here are a starting point; always cross-check with the official Frigate documentation for the version you install.
What you will need
- A camera with RTSP: the TP-Link Tapo C200 exposes an H.264 RTSP stream, which is what Frigate needs.
- A server to run Frigate on (a mini PC, a NAS or a home server with Docker).
- Home Assistant already installed, and an MQTT broker (Mosquitto) so they can talk to each other.
- A drive to record on: the Seagate SkyHawk 4 TB is designed for continuous video writing.
Step 1: create the camera account in the Tapo app
The Tapo’s RTSP does not enable itself. With the camera already set up in the Tapo app:
- Open the camera settings and look for Camera Account (in advanced settings).
- Create your own username and password for the stream. They are not your Tapo account credentials.
- Note the camera’s IP address and, better still, reserve that IP in your router so it does not change.
Once done, you can isolate the camera from the internet on the router if you want it to talk to no external server.
Step 2: check the stream
The Tapo offers two streams. The usual paths are:
rtsp://USER:PASSWORD@CAMERA_IP:554/stream1: high quality.rtsp://USER:PASSWORD@CAMERA_IP:554/stream2: low quality.
Test them before configuring anything by opening the URL in VLC. If you see no picture, check username, password and IP: that is 90% of failures.
Step 3: configure Frigate
The approach that works best is to use the low-quality stream for detection (lighter) and the high-quality stream for recording. A starting point example:
mqtt:
  host: BROKER_IP

cameras:
  living_room:
    ffmpeg:
      inputs:
        - path: rtsp://USER:PASSWORD@CAMERA_IP:554/stream2
          roles:
            - detect
        - path: rtsp://USER:PASSWORD@CAMERA_IP:554/stream1
          roles:
            - record
    detect:
      enabled: true
    objects:
      track:
        - person
    record:
      enabled: true
Key pieces:
rolesassigns each stream:detectfor analysis andrecordfor saving.objects.tracksays which objects matter. Withpersonit alerts you about people and not cars or cats.recordenables recording. Retention (how many days to keep and whether only with motion or detections) is named differently across versions: check it in the documentation.
Step 4: connect to Home Assistant
- Install the Frigate integration for Home Assistant, usually through HACS.
- Point the integration at your Frigate address.
- You will see the cameras as entities, with occupancy and per-object detection sensors.
From there you can create automations: send a snapshot to your phone when a person is detected, turn on a light or trigger a scene.
Step 5: the recording drive
Recording continuous video is a constant write load that a desktop drive is not designed to withstand. The SkyHawk is rated for 180 TB of writes per year and its firmware is optimised for video. If you mount it in a NAS, expose a folder to Frigate (for example over NFS) and point recording storage there. Keep in mind that it spins at 5400 RPM, so it is slow for other uses and audible: better in a separate room.
Limitations to know about
- Black-and-white night vision: the infrared image is monochrome, useful for detecting presence but not for identifying colours.
- Aggressive compression: in low light or heavy movement, H.264 degrades the image. It is good for detecting people, not for facial recognition.
- No accelerator: detecting objects on CPU works for a few cameras, but if you set up several, a detection accelerator is worth it. Check the supported options in the Frigate documentation.
- First setup needs the app and a Tapo account, even though you can isolate the camera afterwards.
Common mistakes
- Using the Tapo account credentials in the RTSP URL. You have to create the camera account separately.
- Running detection on the high-quality stream. It is needlessly heavy.
- Not reserving the camera’s IP. If it changes, Frigate loses the camera.
- Recording continuously on a drive that is not designed for it.
- Copying a
config.ymlfrom a tutorial for another version. Some keys have been renamed.
Where to start
- One camera, the C200, and check the RTSP with VLC.
- Frigate with a single camera and person detection.
- The Home Assistant integration and a first alert on your phone.
- Only then, more cameras and the dedicated drive.
Start with one camera. Once you see how much it cuts false positives compared with a simple motion detector, you will understand why it is worth it.
Products mentioned
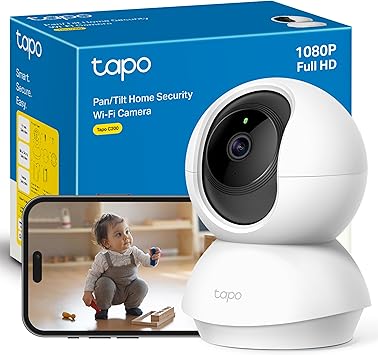
TP-Link Tapo C200
Cámara WiFi 360° con visión nocturna por 19€. La tengo integrada con Frigate y Home Assistant vía RTSP. La mejor relación calidad-precio para vigilancia DIY.
19.99€
39.99€
Seagate SkyHawk 4TB
Disco duro optimizado para vigilancia 24/7. Lo tengo en TrueNAS grabando las cámaras Frigate sin parar. Lleva meses sin un solo error SMART.
238.44€